

Already on Tencent Cloud Lighthouse Lightweight Application Server Users deployed on OpenClaw want to upgrade to the latest version while retaining important data (such as memories, skills, etc.).
1. Why update OpenClaw?
OpenClaw is currently in a phase of rapid iteration, continuously releasing new features, fixing issues, and optimizing plugin support and IM channel integration experience. Older versions may lack these improvements, so it is recommended to upgrade to the latest version promptly.
2. Important preparations before updating
2.1 Confirm deployment environment
Ensure that OpenClaw is running normally and can access the corresponding instance through the Lighthouse console.
2.2 Determine if an update is needed
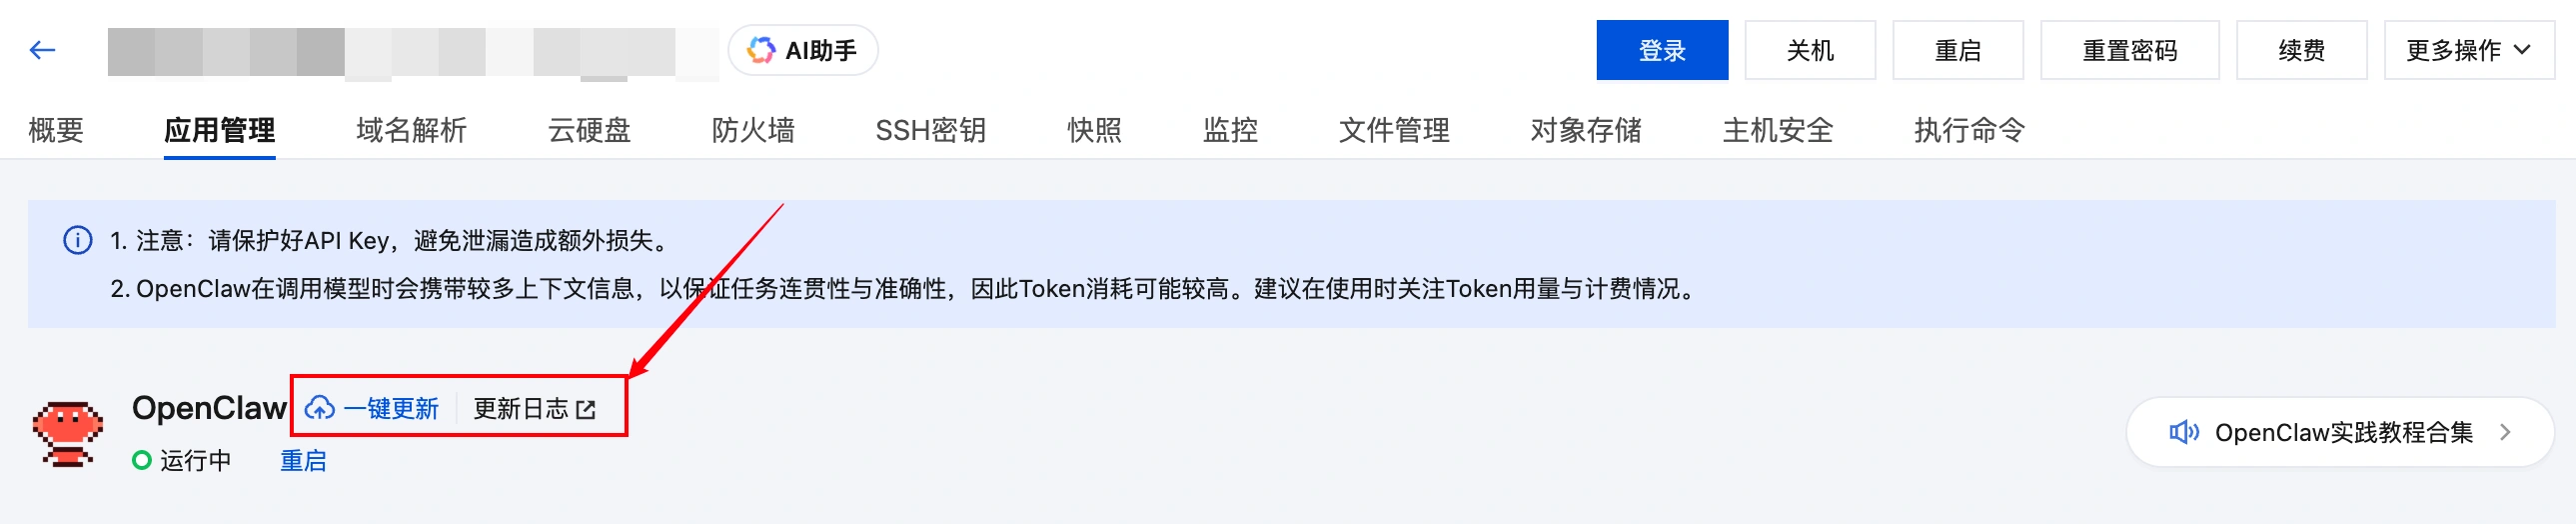
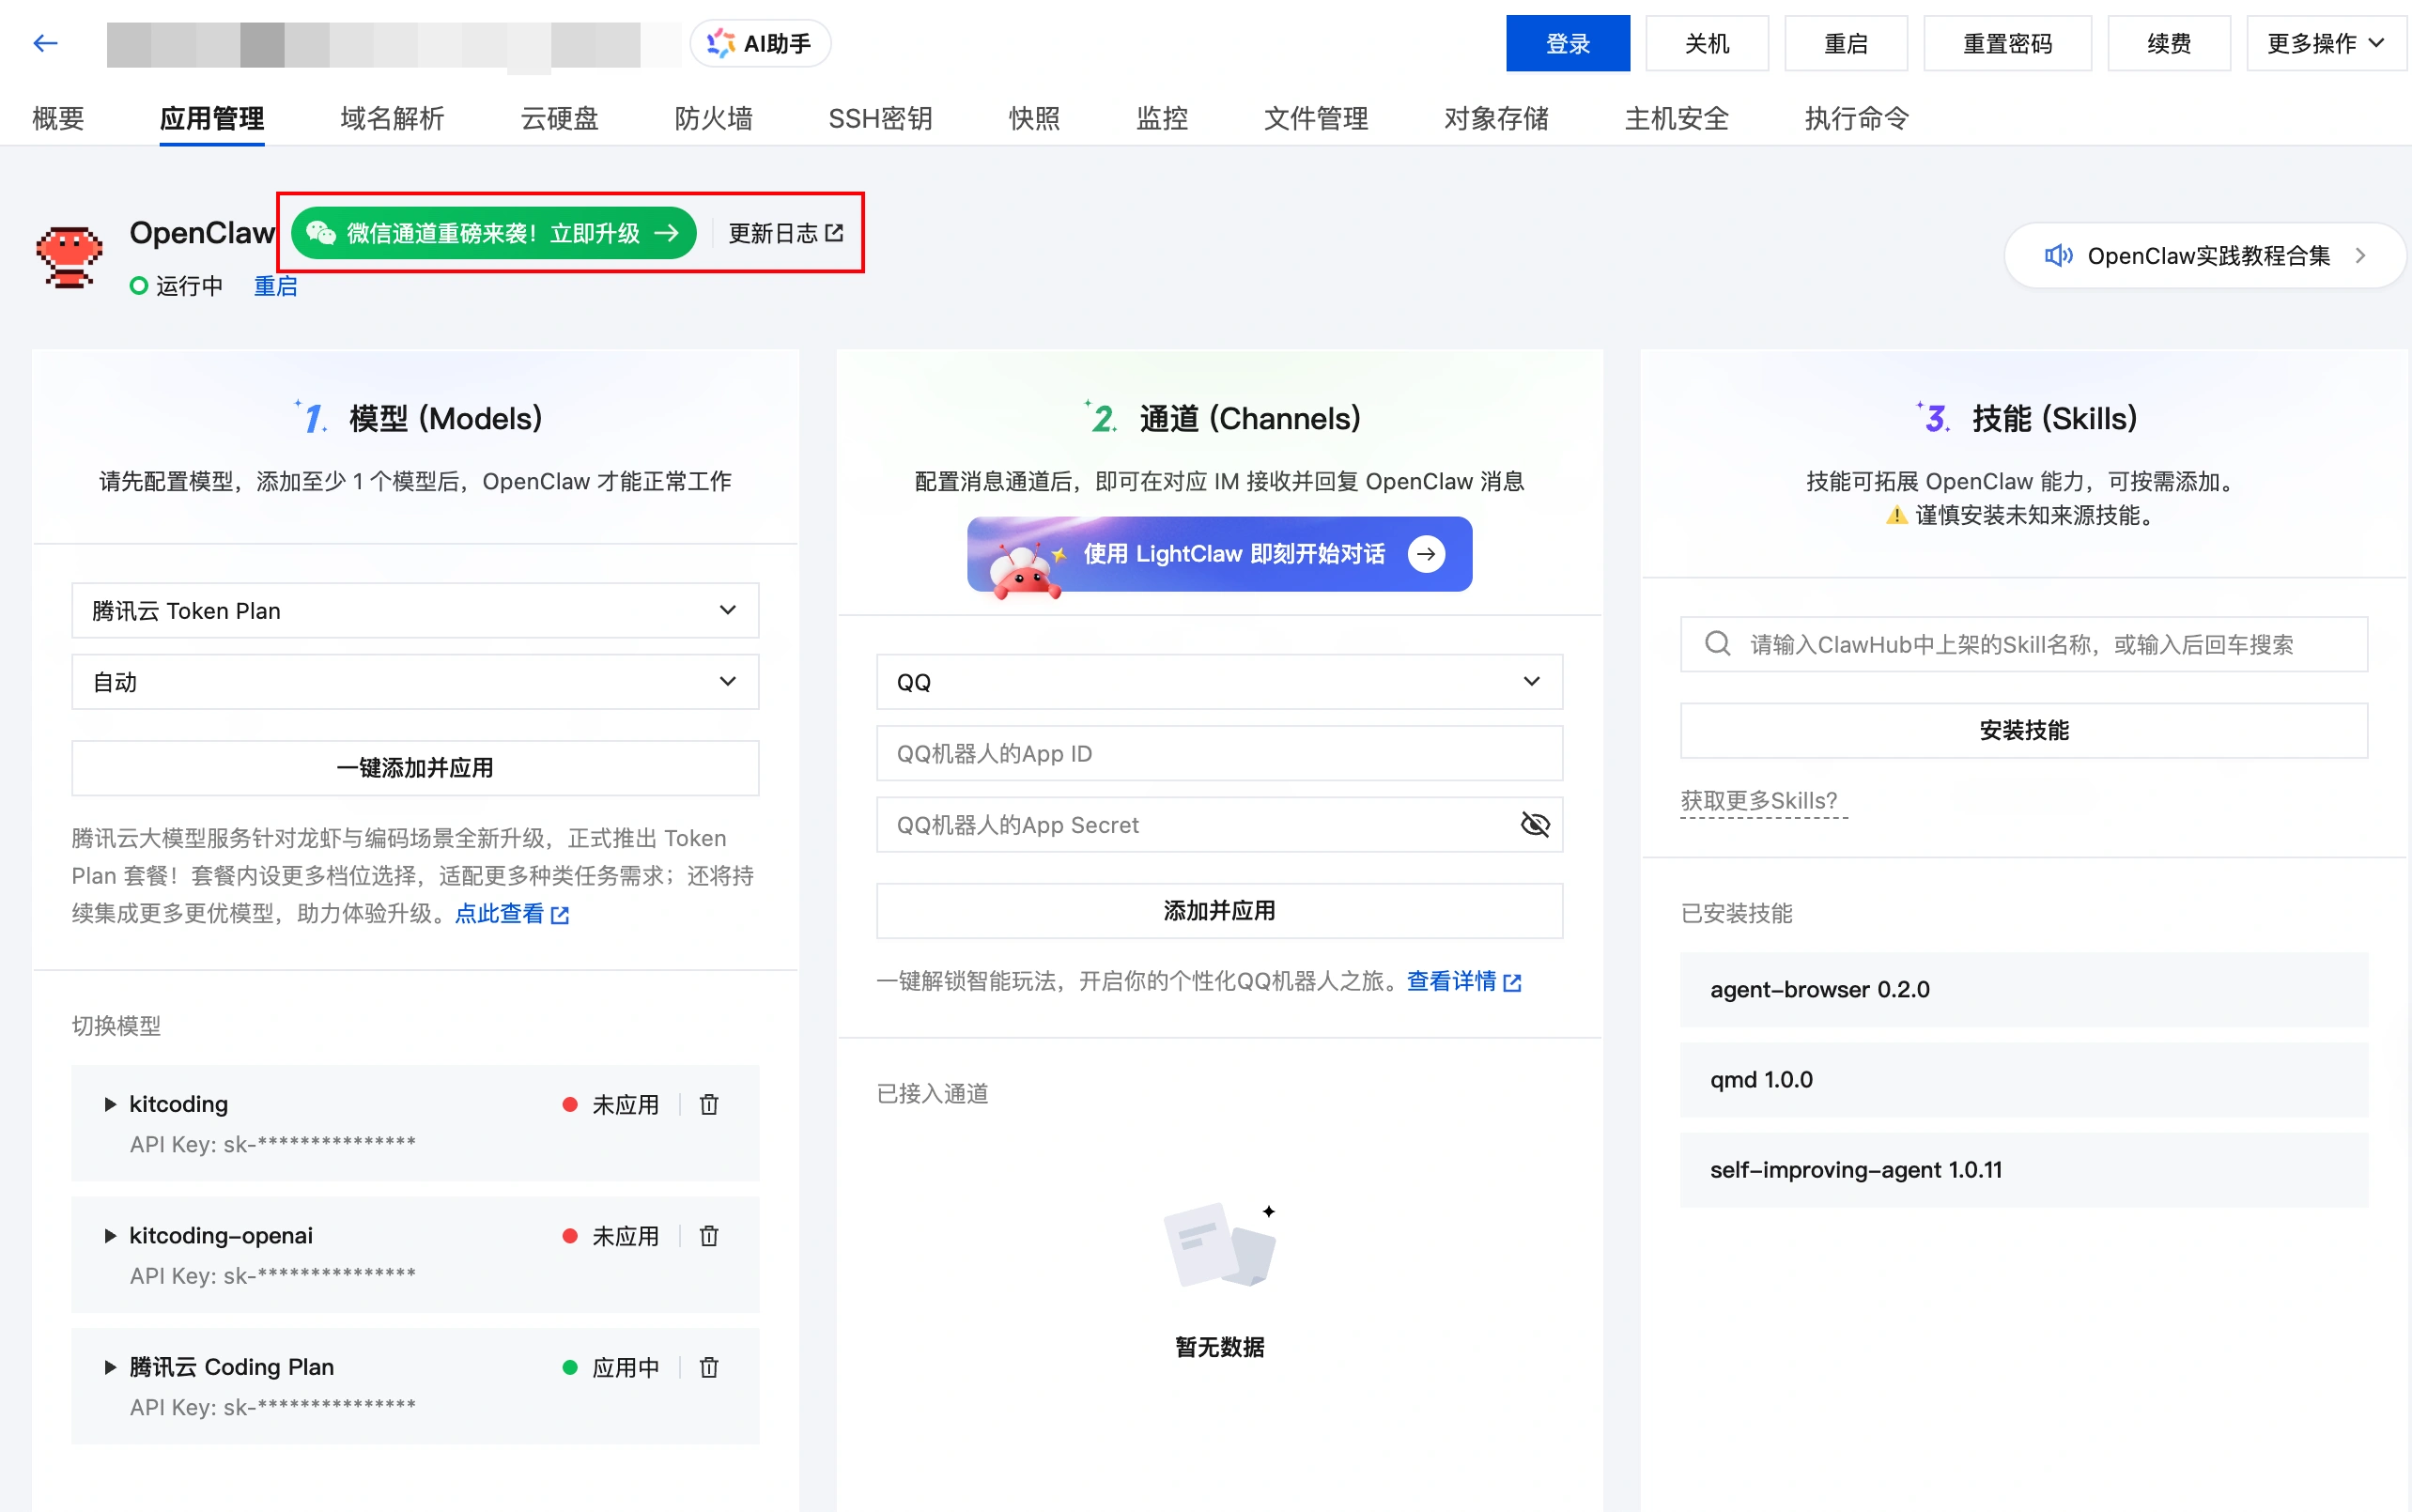
- In the OpenClaw Application Management Panel Check if it appears One-Click Update Button。
👉 If it appears, it means it can be updated currently.
3. Two Ways to Update OpenClaw
Currently, OpenClaw can be updated in the following two ways:
Method 1: One-click update (recommended)
This is the simplest and safest way to update, allowing an upgrade without reinstalling the system.
Steps are as follows:
- Log in Lighthouse console → Enter OpenClaw instance details.
- Find in admin interface “One-click update” Button.
- Click update and confirm the prompt pop-up.
⚠️ Caution: The update process may take 5–10 minutes。 - Wait for the update to complete automatically and refresh the interface.
❗After updating Channel configurations will be cleared, but models, skills, and memories will not be lost.
👉 You need to after the update ends Reconfigure channel connections (such as WeCom, QQ, etc.)。
take note of
If the one-click update fails multiple times, it is recommended to refer to the “Manual Update” method later in the text to complete the update.

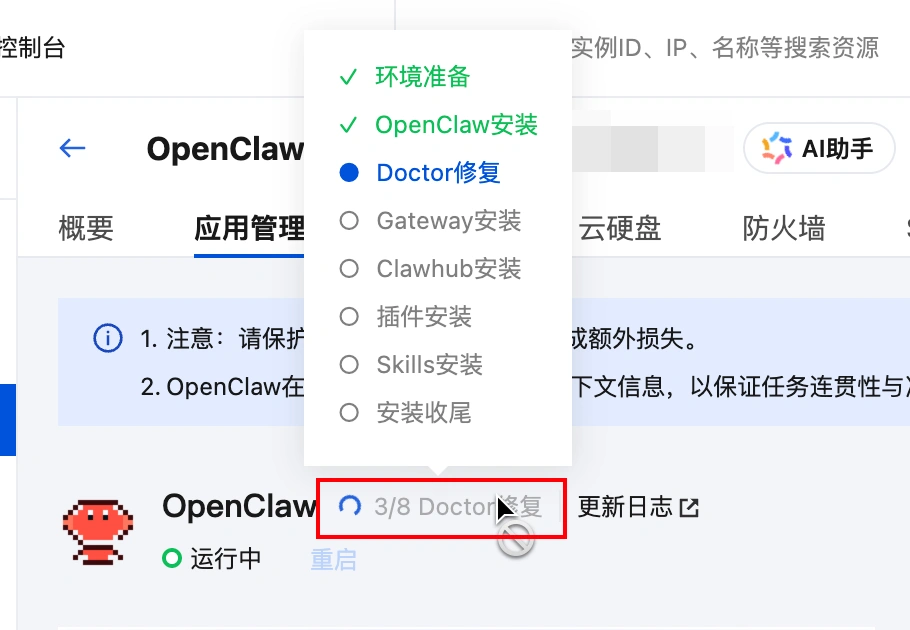
After starting the update, you can move the mouse to the position shown in the diagram to view the update progress:
After the update is complete, the one-click update button in the configuration panel will disappear, and you can then proceed with the next steps.

Method Two: Manual Update
You can also via Reinstall System by reinstalling the system, update the OpenClaw application template currently deployed in the Lightweight Application Server Lighthouse to the latest version. However, please note that reinstalling the system will erase all data on the server disk. Therefore, before reinstalling, be sure to back up data such as OpenClaw's memory to facilitate recovery after reinstallation.
Step 1: Download OpenClaw's memories to local
Description:If you believe the current OpenClaw memory does not need to be saved, you can skip this step and proceed directly with reinstalling the system.
The memory of OpenClaw is somewhat like a save file in a game; some can be cleared at any time, while others are very precious. Therefore, we recommend that you save these memories before reinstalling and reinject them after the reinstallation is complete, allowing the memories to be “reborn” in the new environment.
Typically, your OpenClaw saves valuable memories in two locations:
- Daily logs:
memory/YYYY-MM-DD.md - Long-term memories:
MEMORY.md(if any)
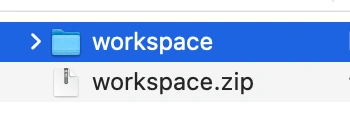
These files, along with content such as Skills, are stored within the instance in the workspace folder. Therefore, before reinstalling, our goal is: through Lighthouse's File Management function, to first download the entire workspace folder locally.
draw attention to sth.
If your workspace size exceeds 500MB, it is recommended to refer to File Transfer Guide, transfer via a method more suitable for large files.
- Log in to the Lighthouse console and navigate to the details page of the OpenClaw instance.
- Find and enter File Management page:
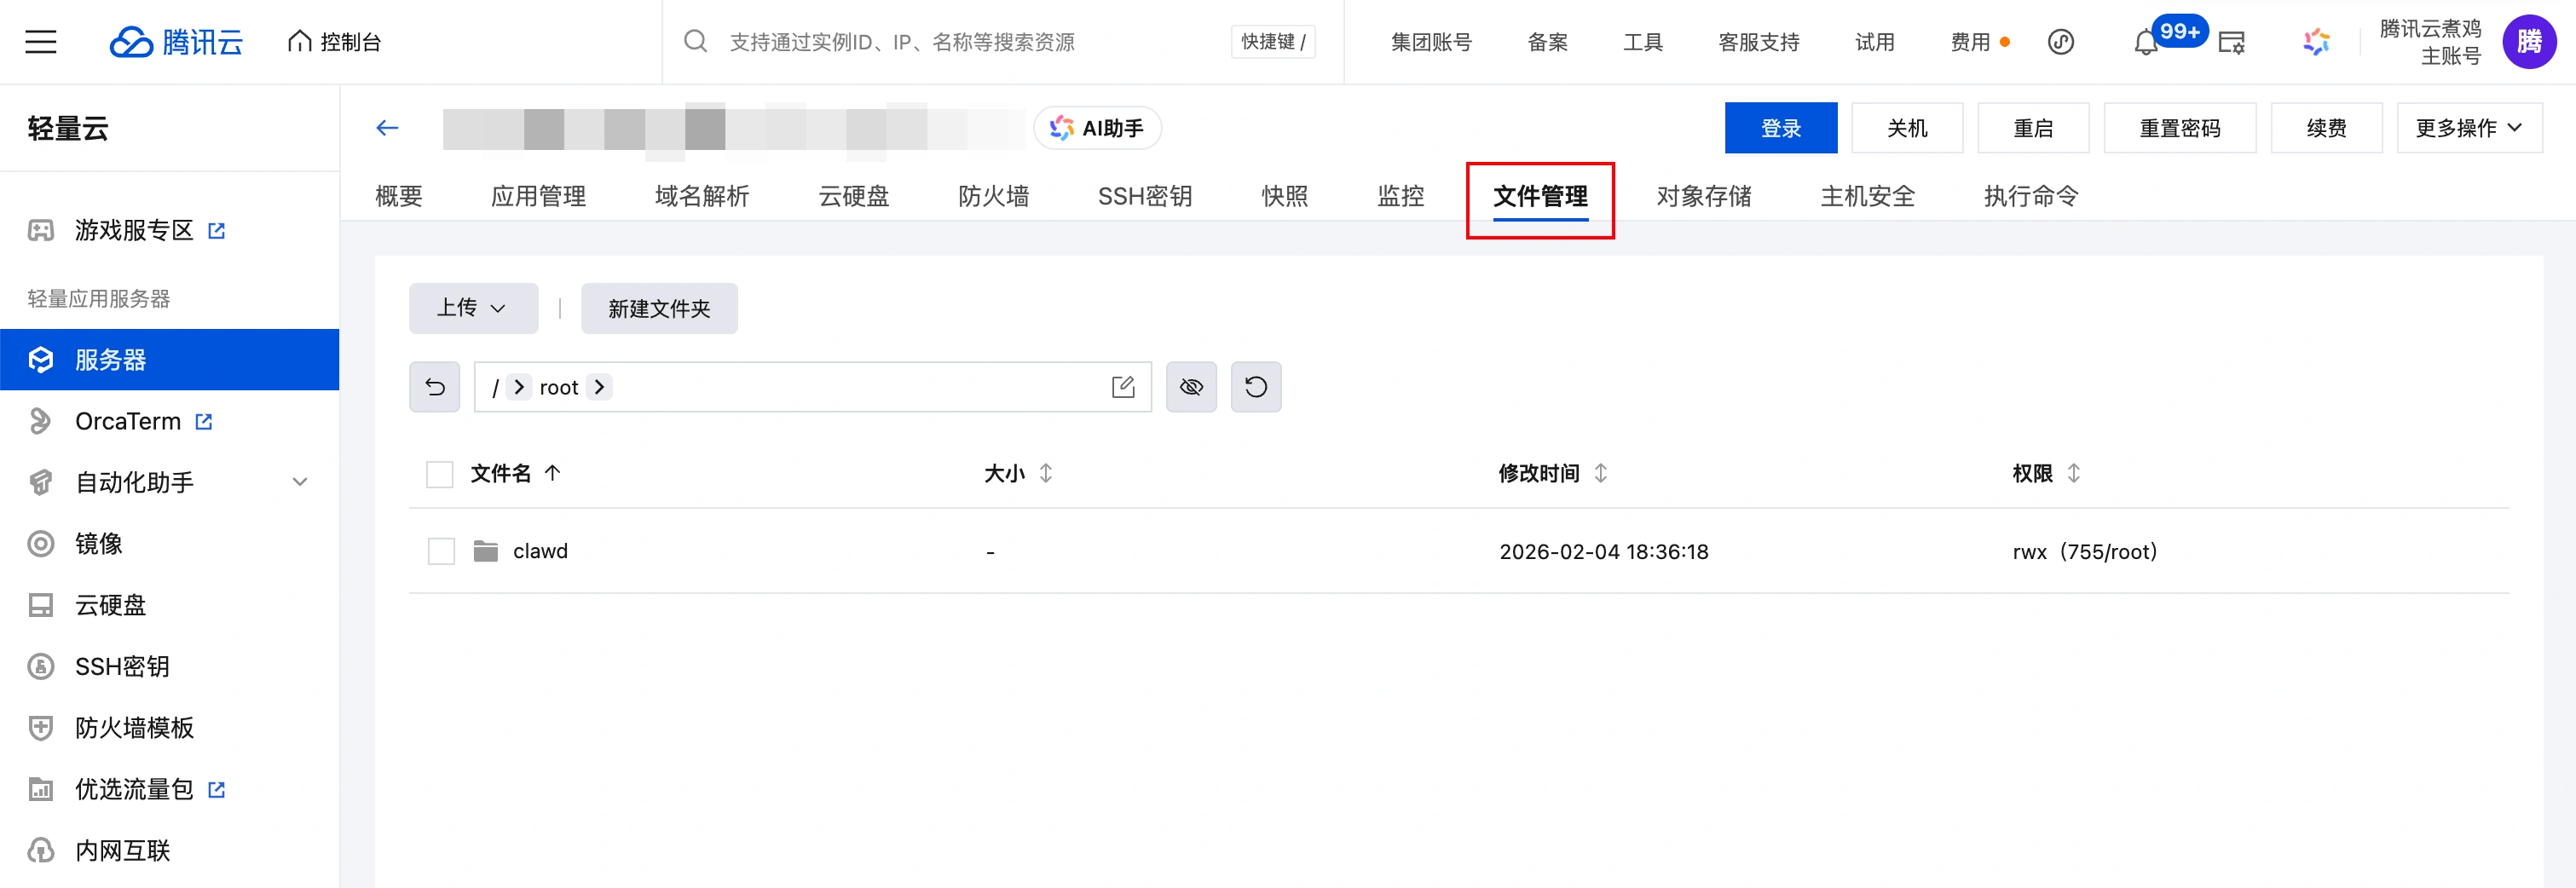
- In the path input box at the top of the page, paste the following path and press Enter:
/root/.openclaw/ - Check
workspaceIn the file management page, click Download button. Lighthouse will automaticallyworkspaceCompress and package it, then download it to your local computer via your browser. Please keep this compressed file safe, as it will be needed for memory recovery later.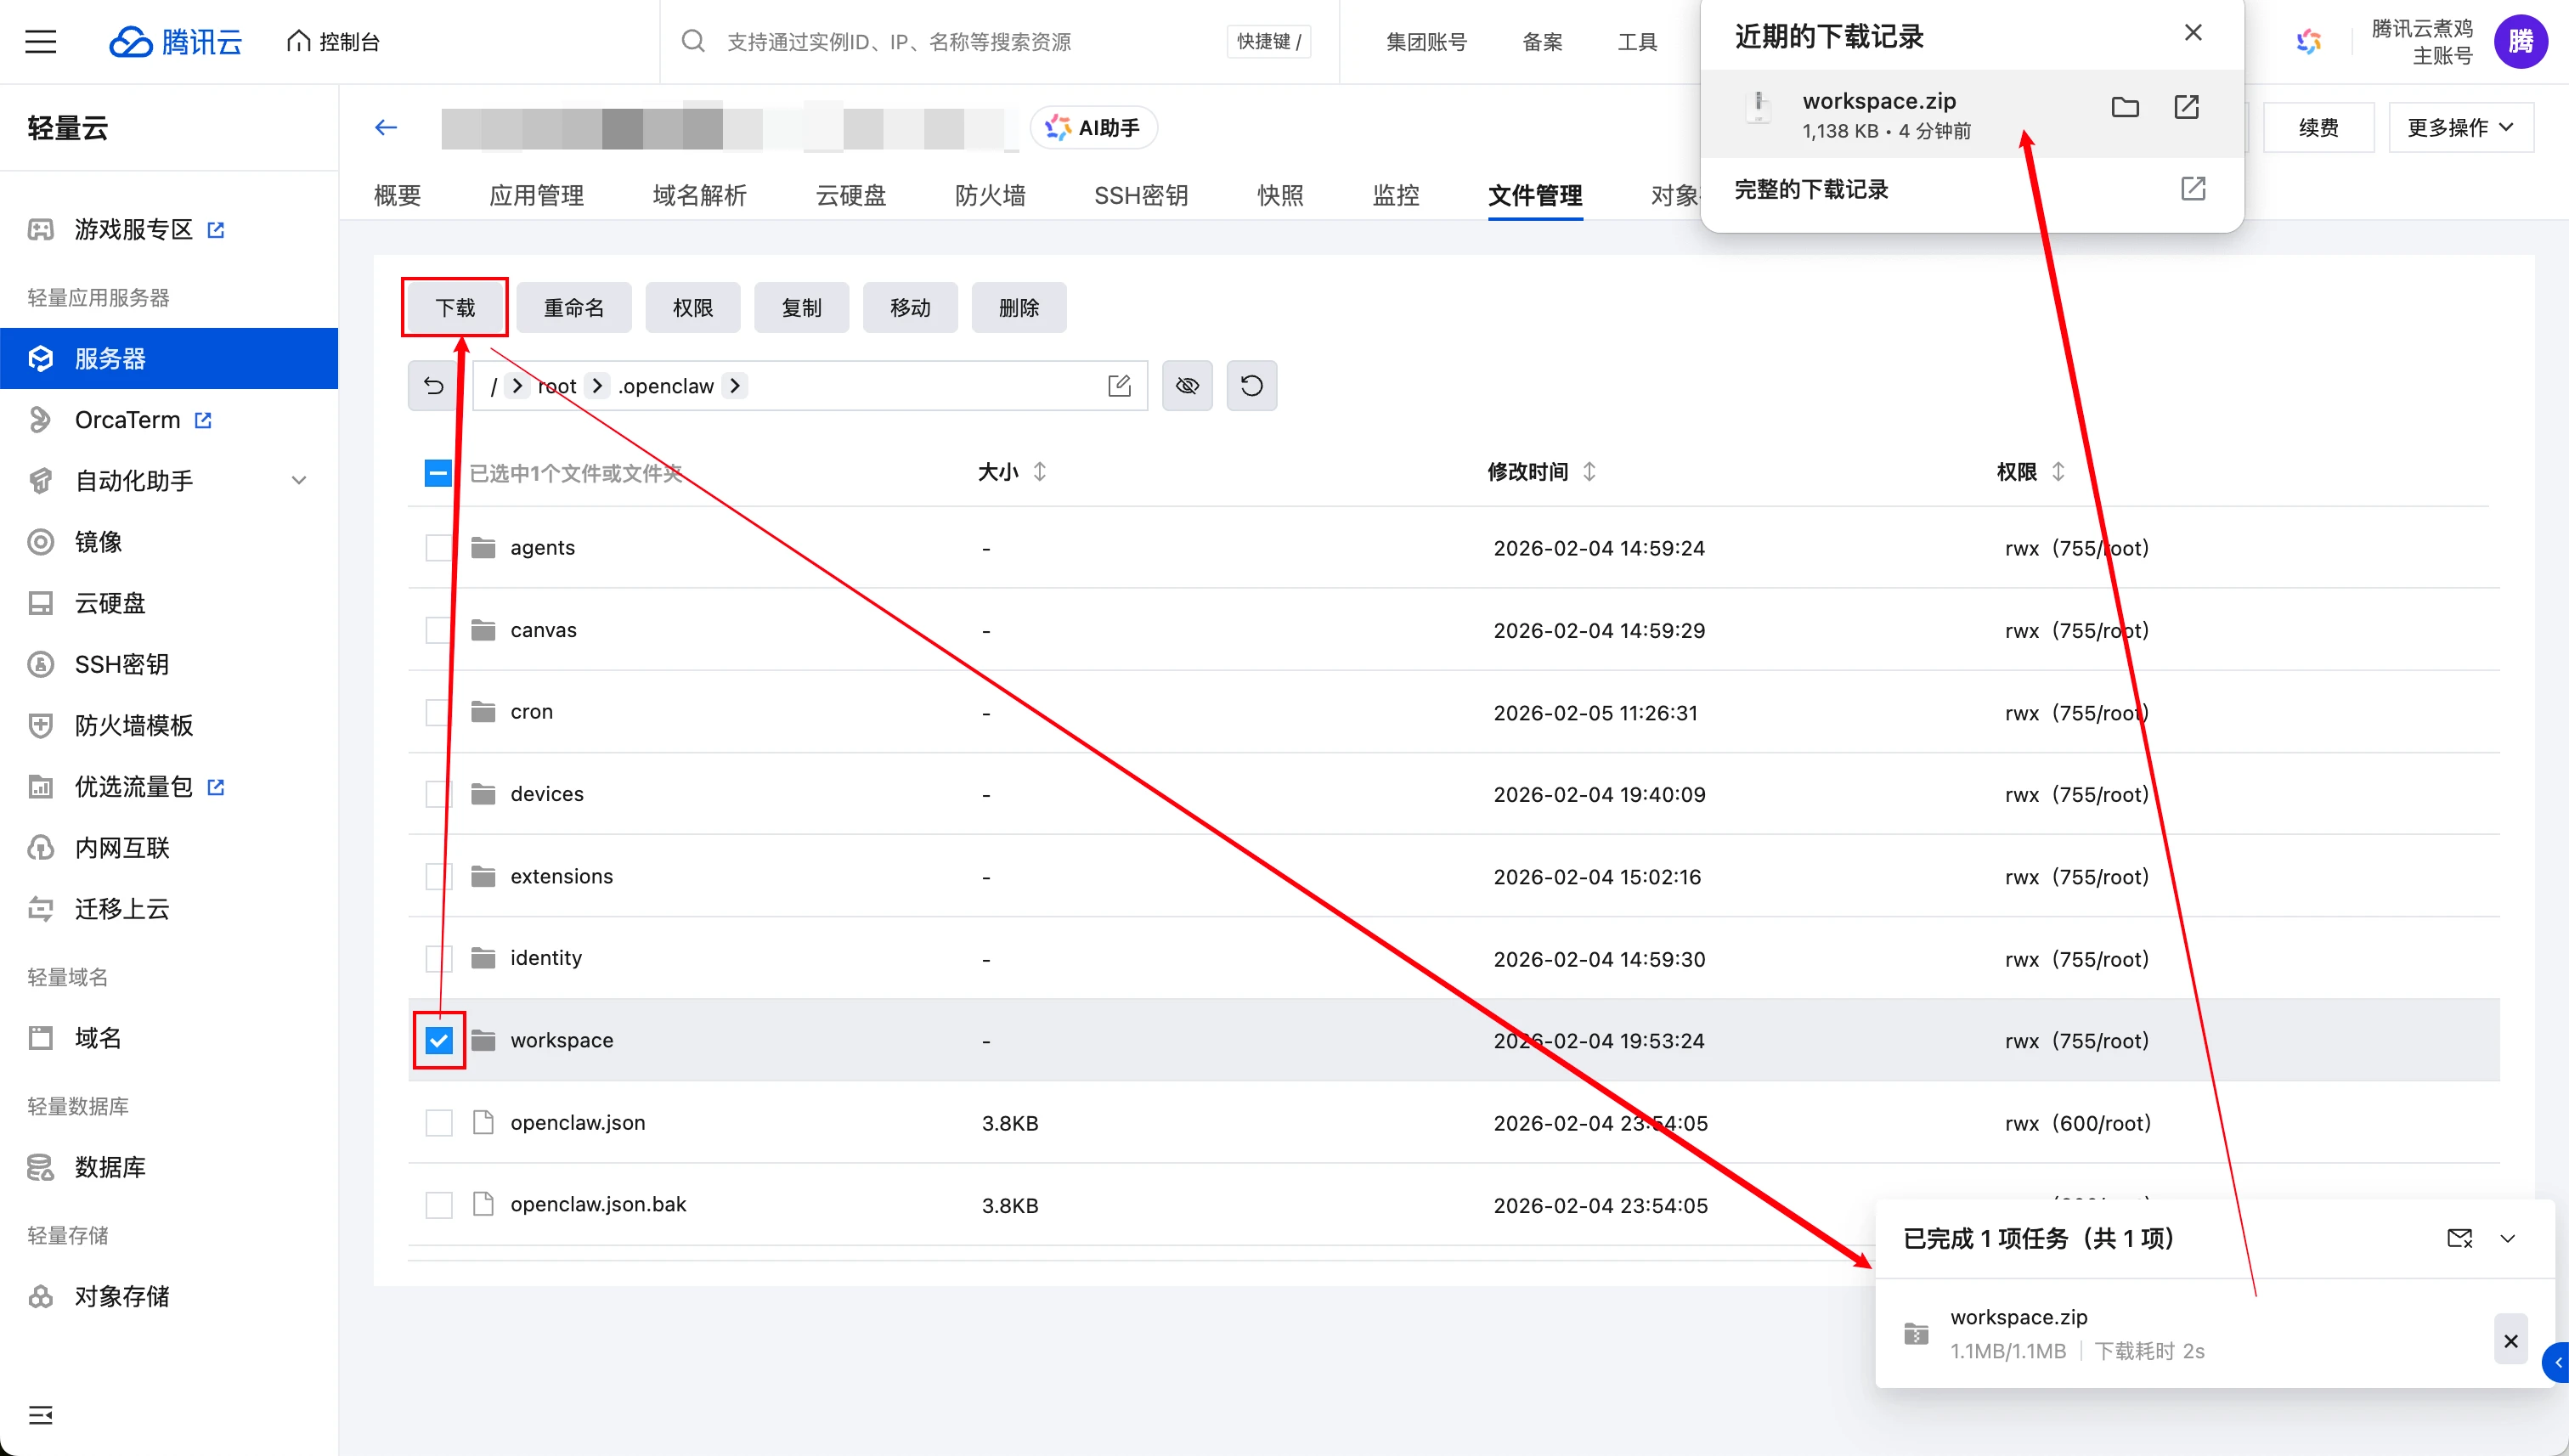
Step 2: Upgrade the application template version by reinstalling the system
This section will guide you through completing it in Lighthouse Reinstall SystemComplete the upgrade of the OpenClaw application template.
take note of
During the reinstallation process, the system will automatically shut down forcibly; after reinstallation is complete, all data on the instance's system disk will be cleared and restored to its initial state. This operation is irreversible, so please proceed with caution!
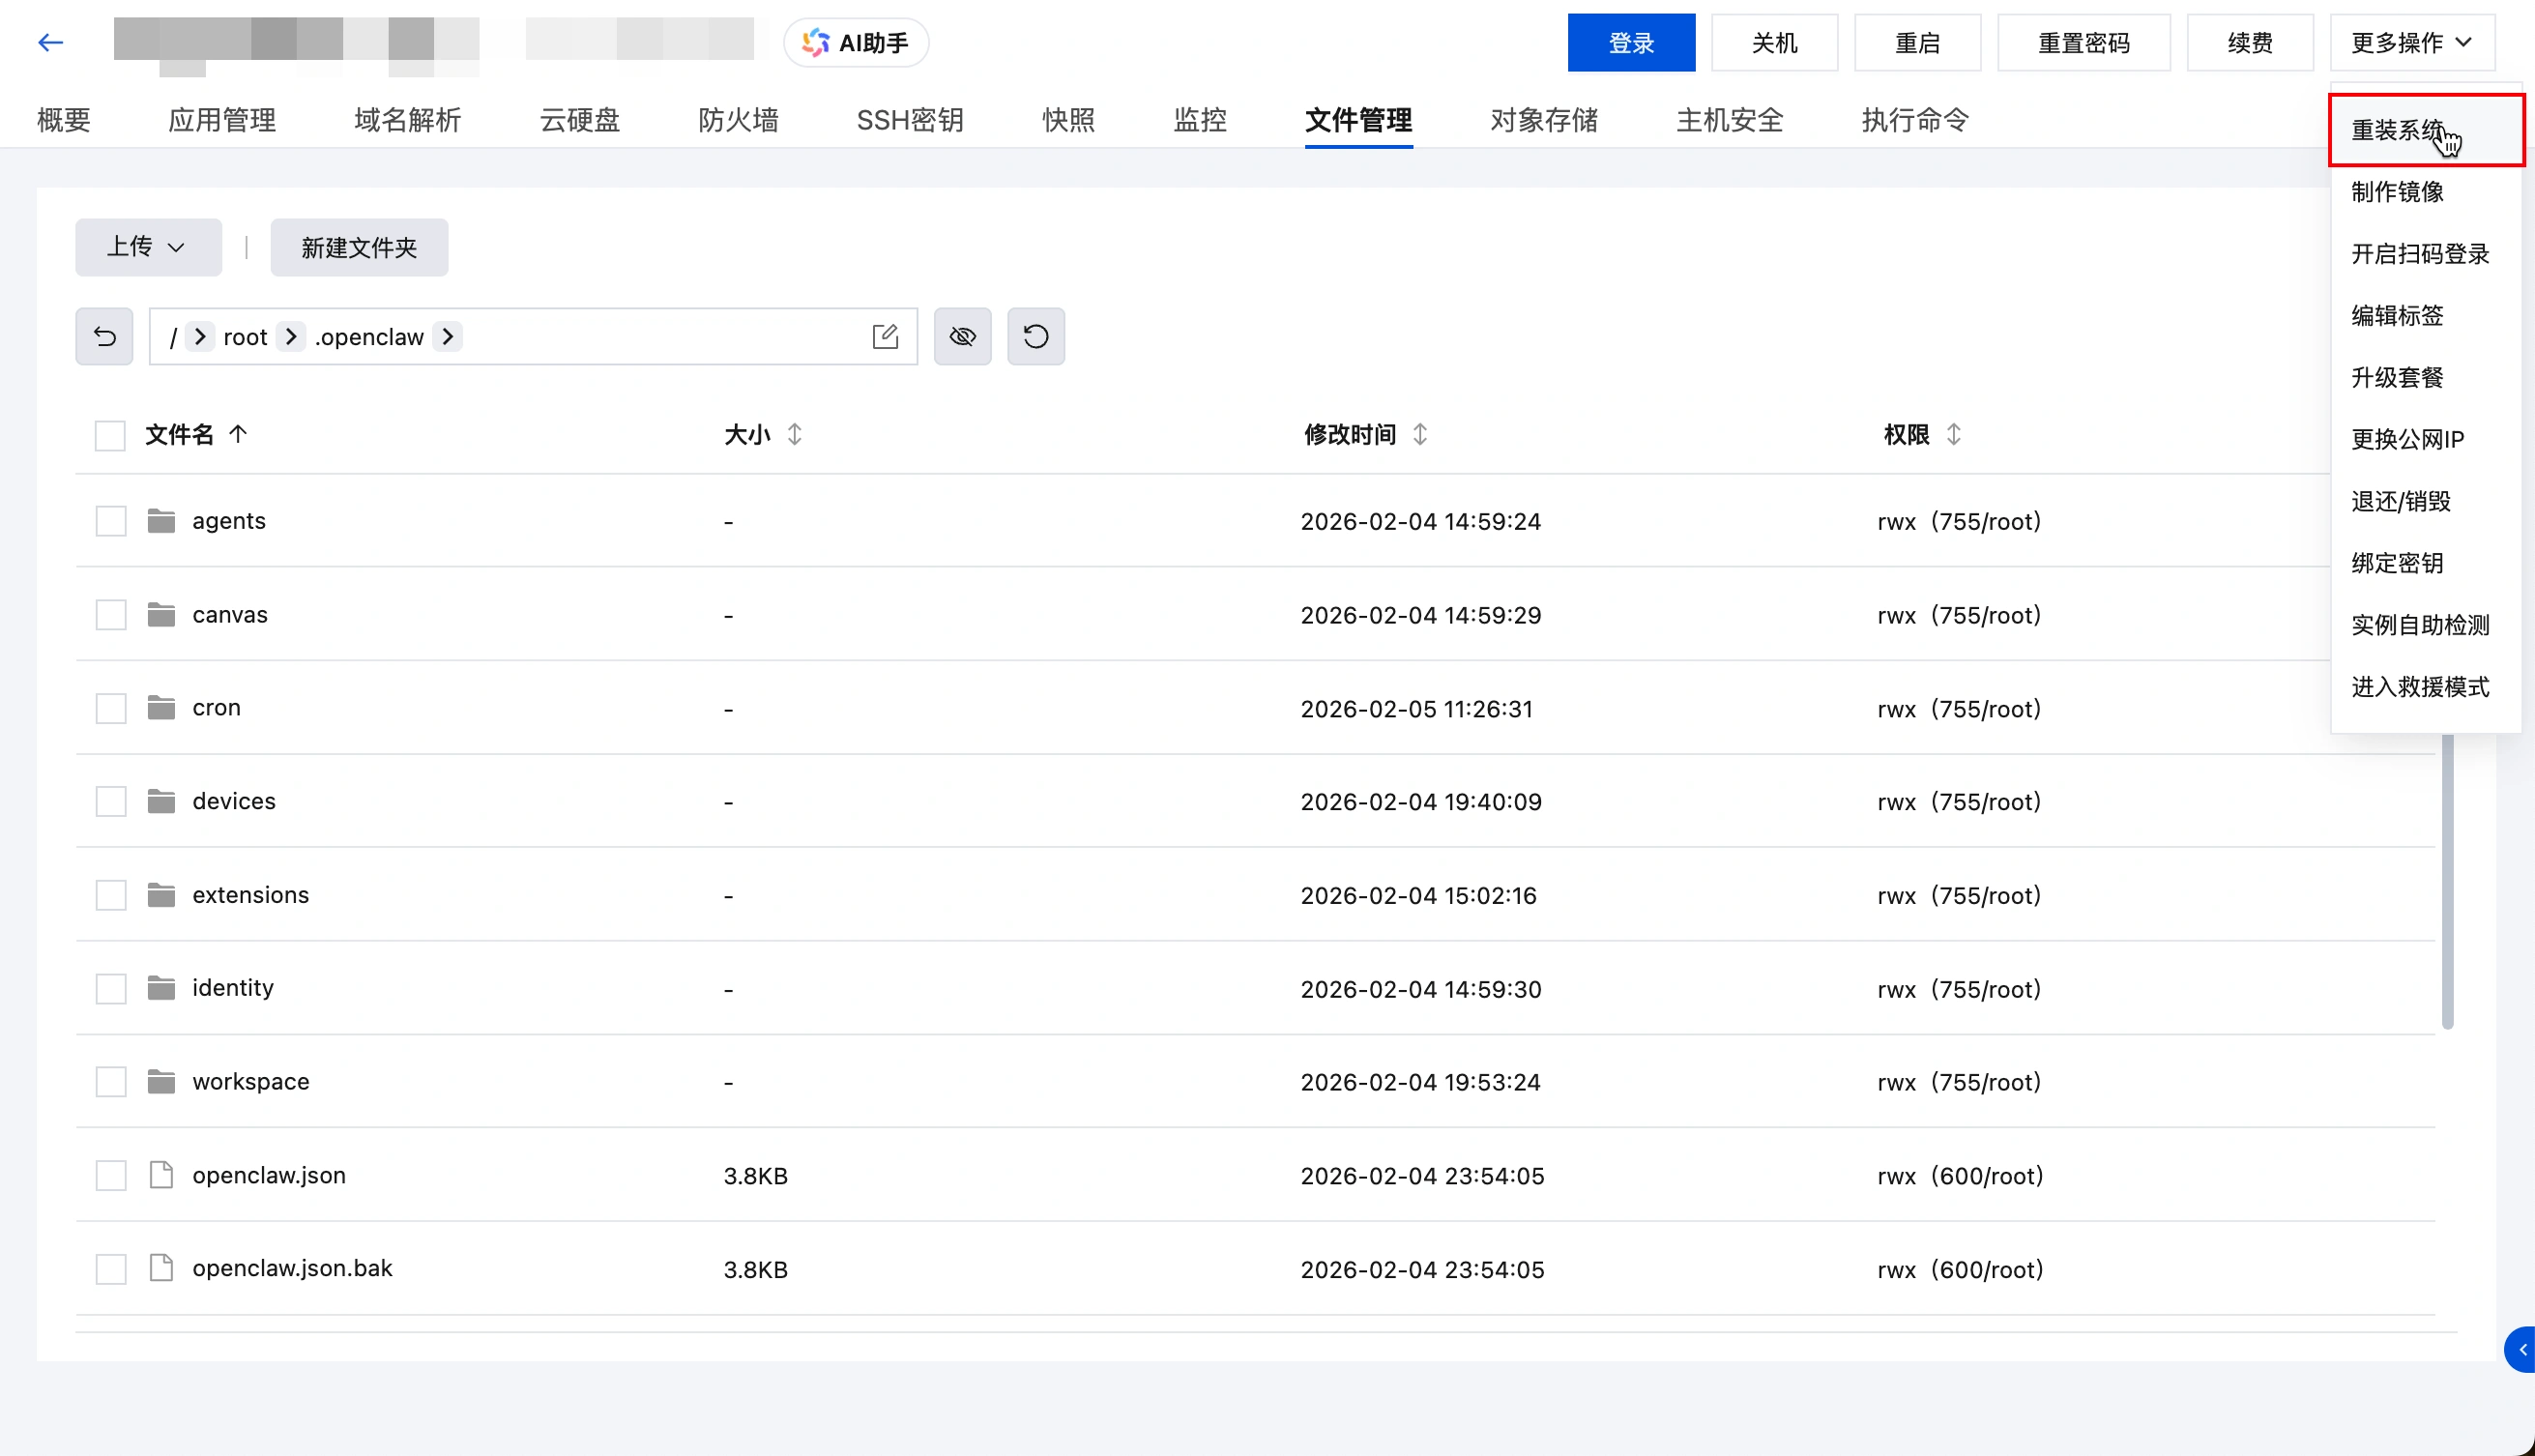
- Enter the Lighthouse instance list or instance details page, find and click through “···” or “More Actions” Reinstall SystemGo to the reinstall system page:
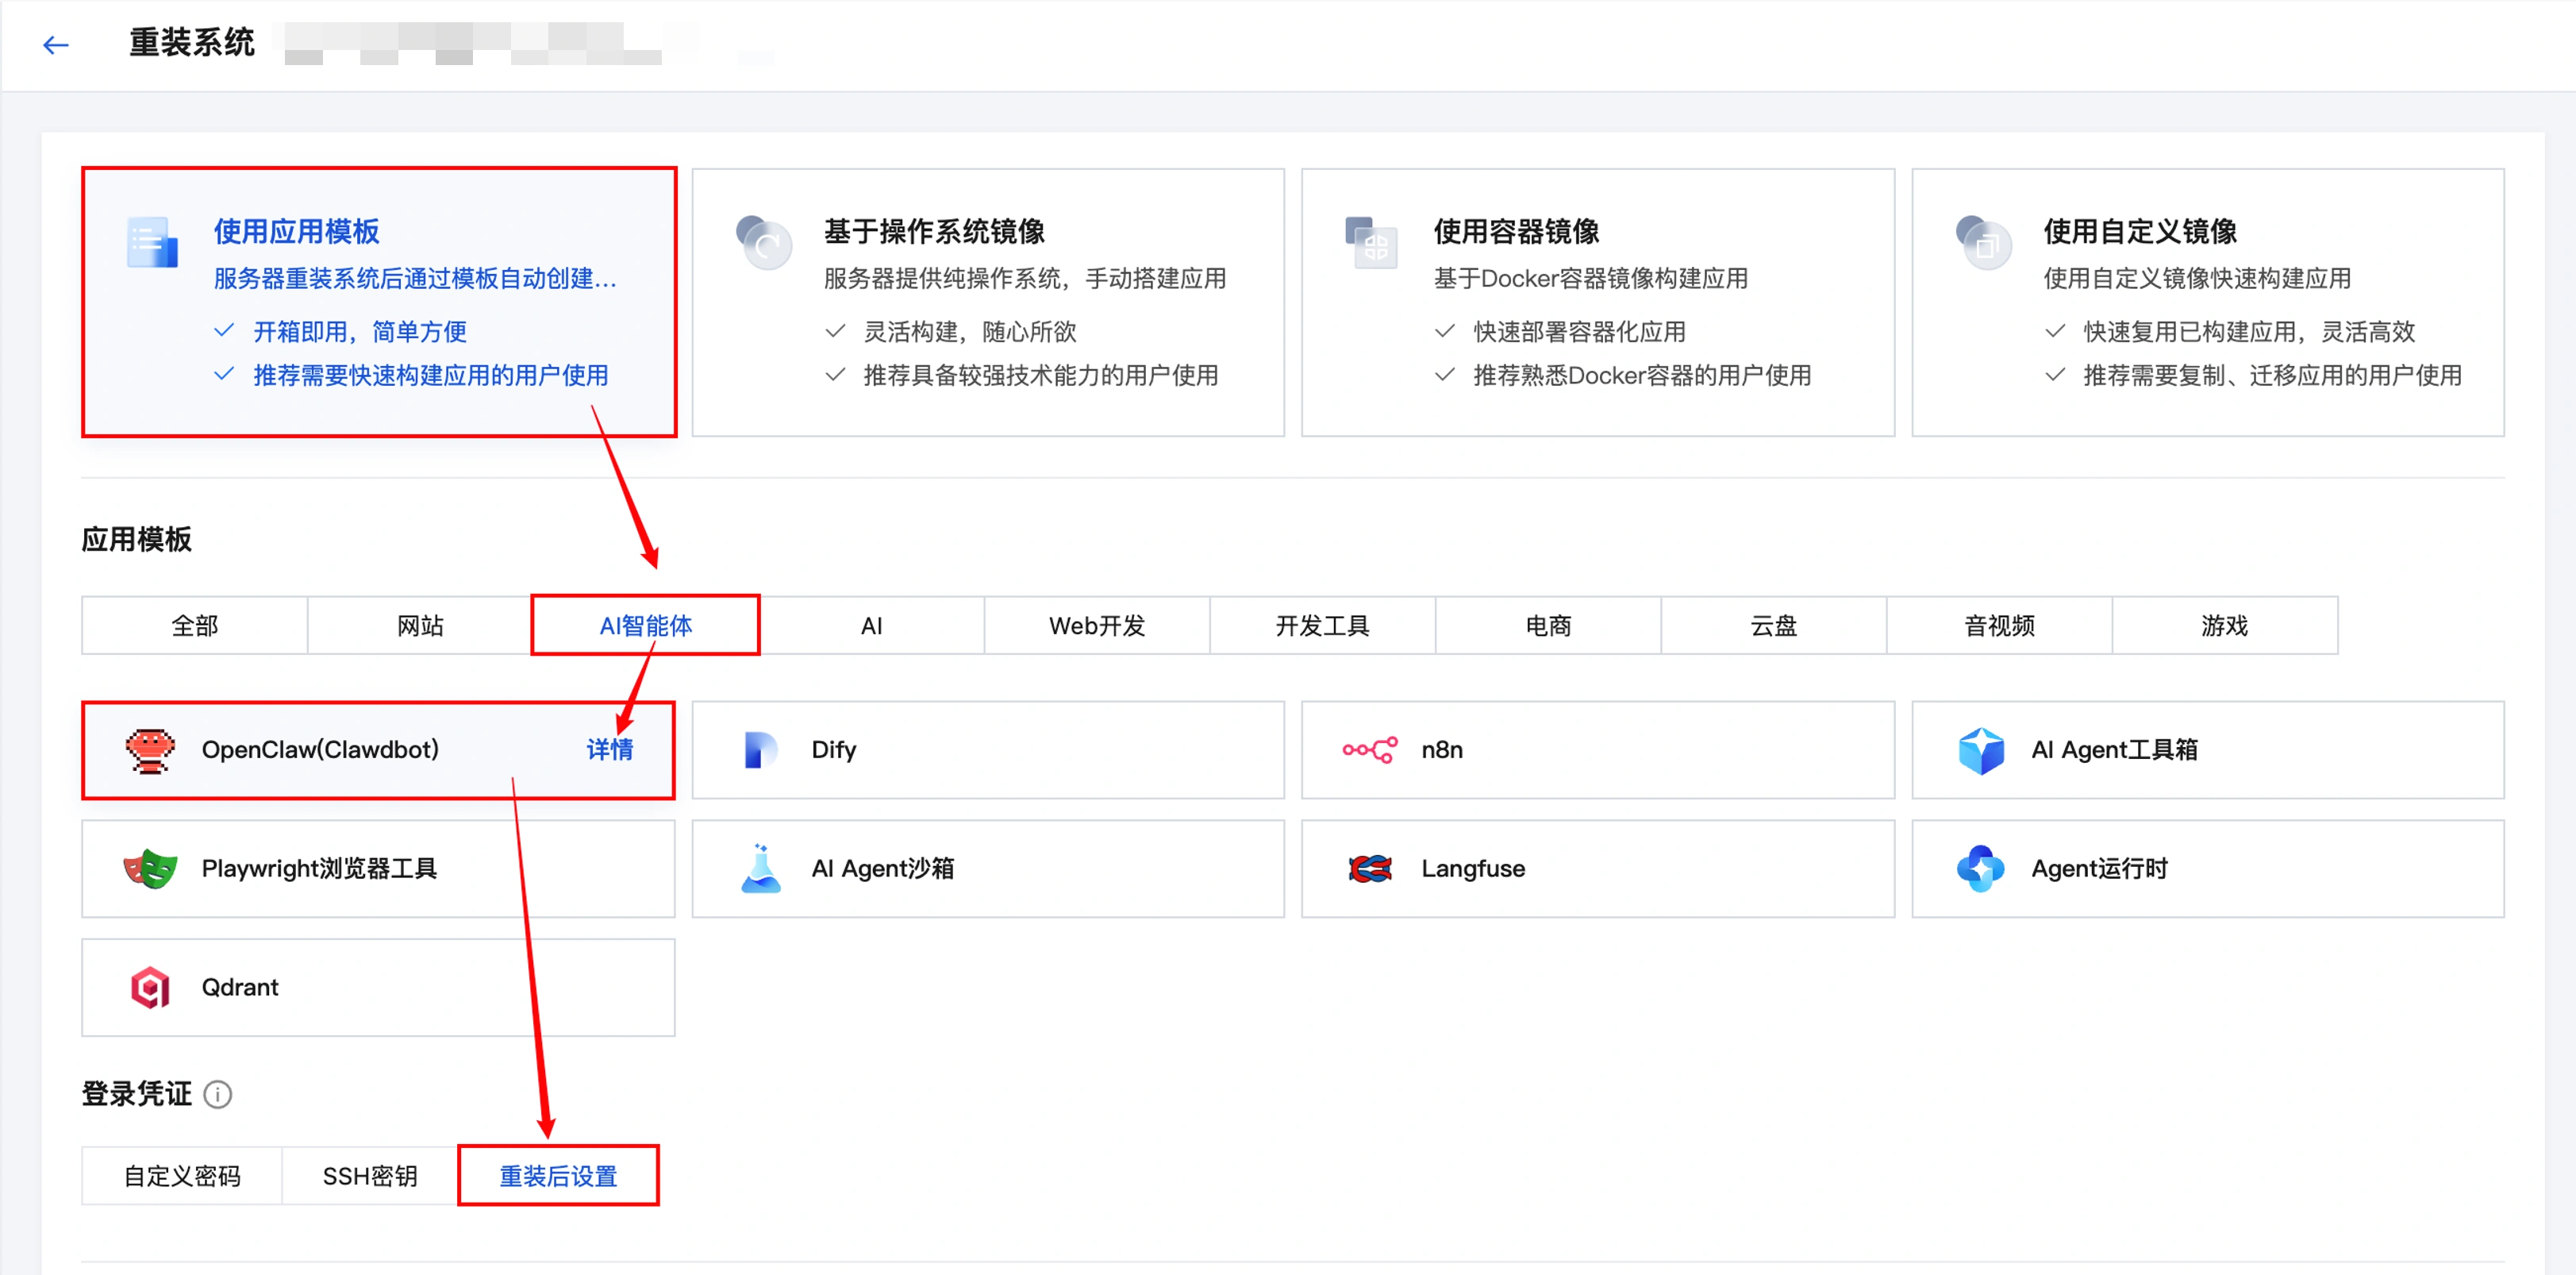
- On the reinstall system page, select in order:Application Template > AI Agent > OpenClawLogin credentials can temporarily be set to “Set after reinstall”.
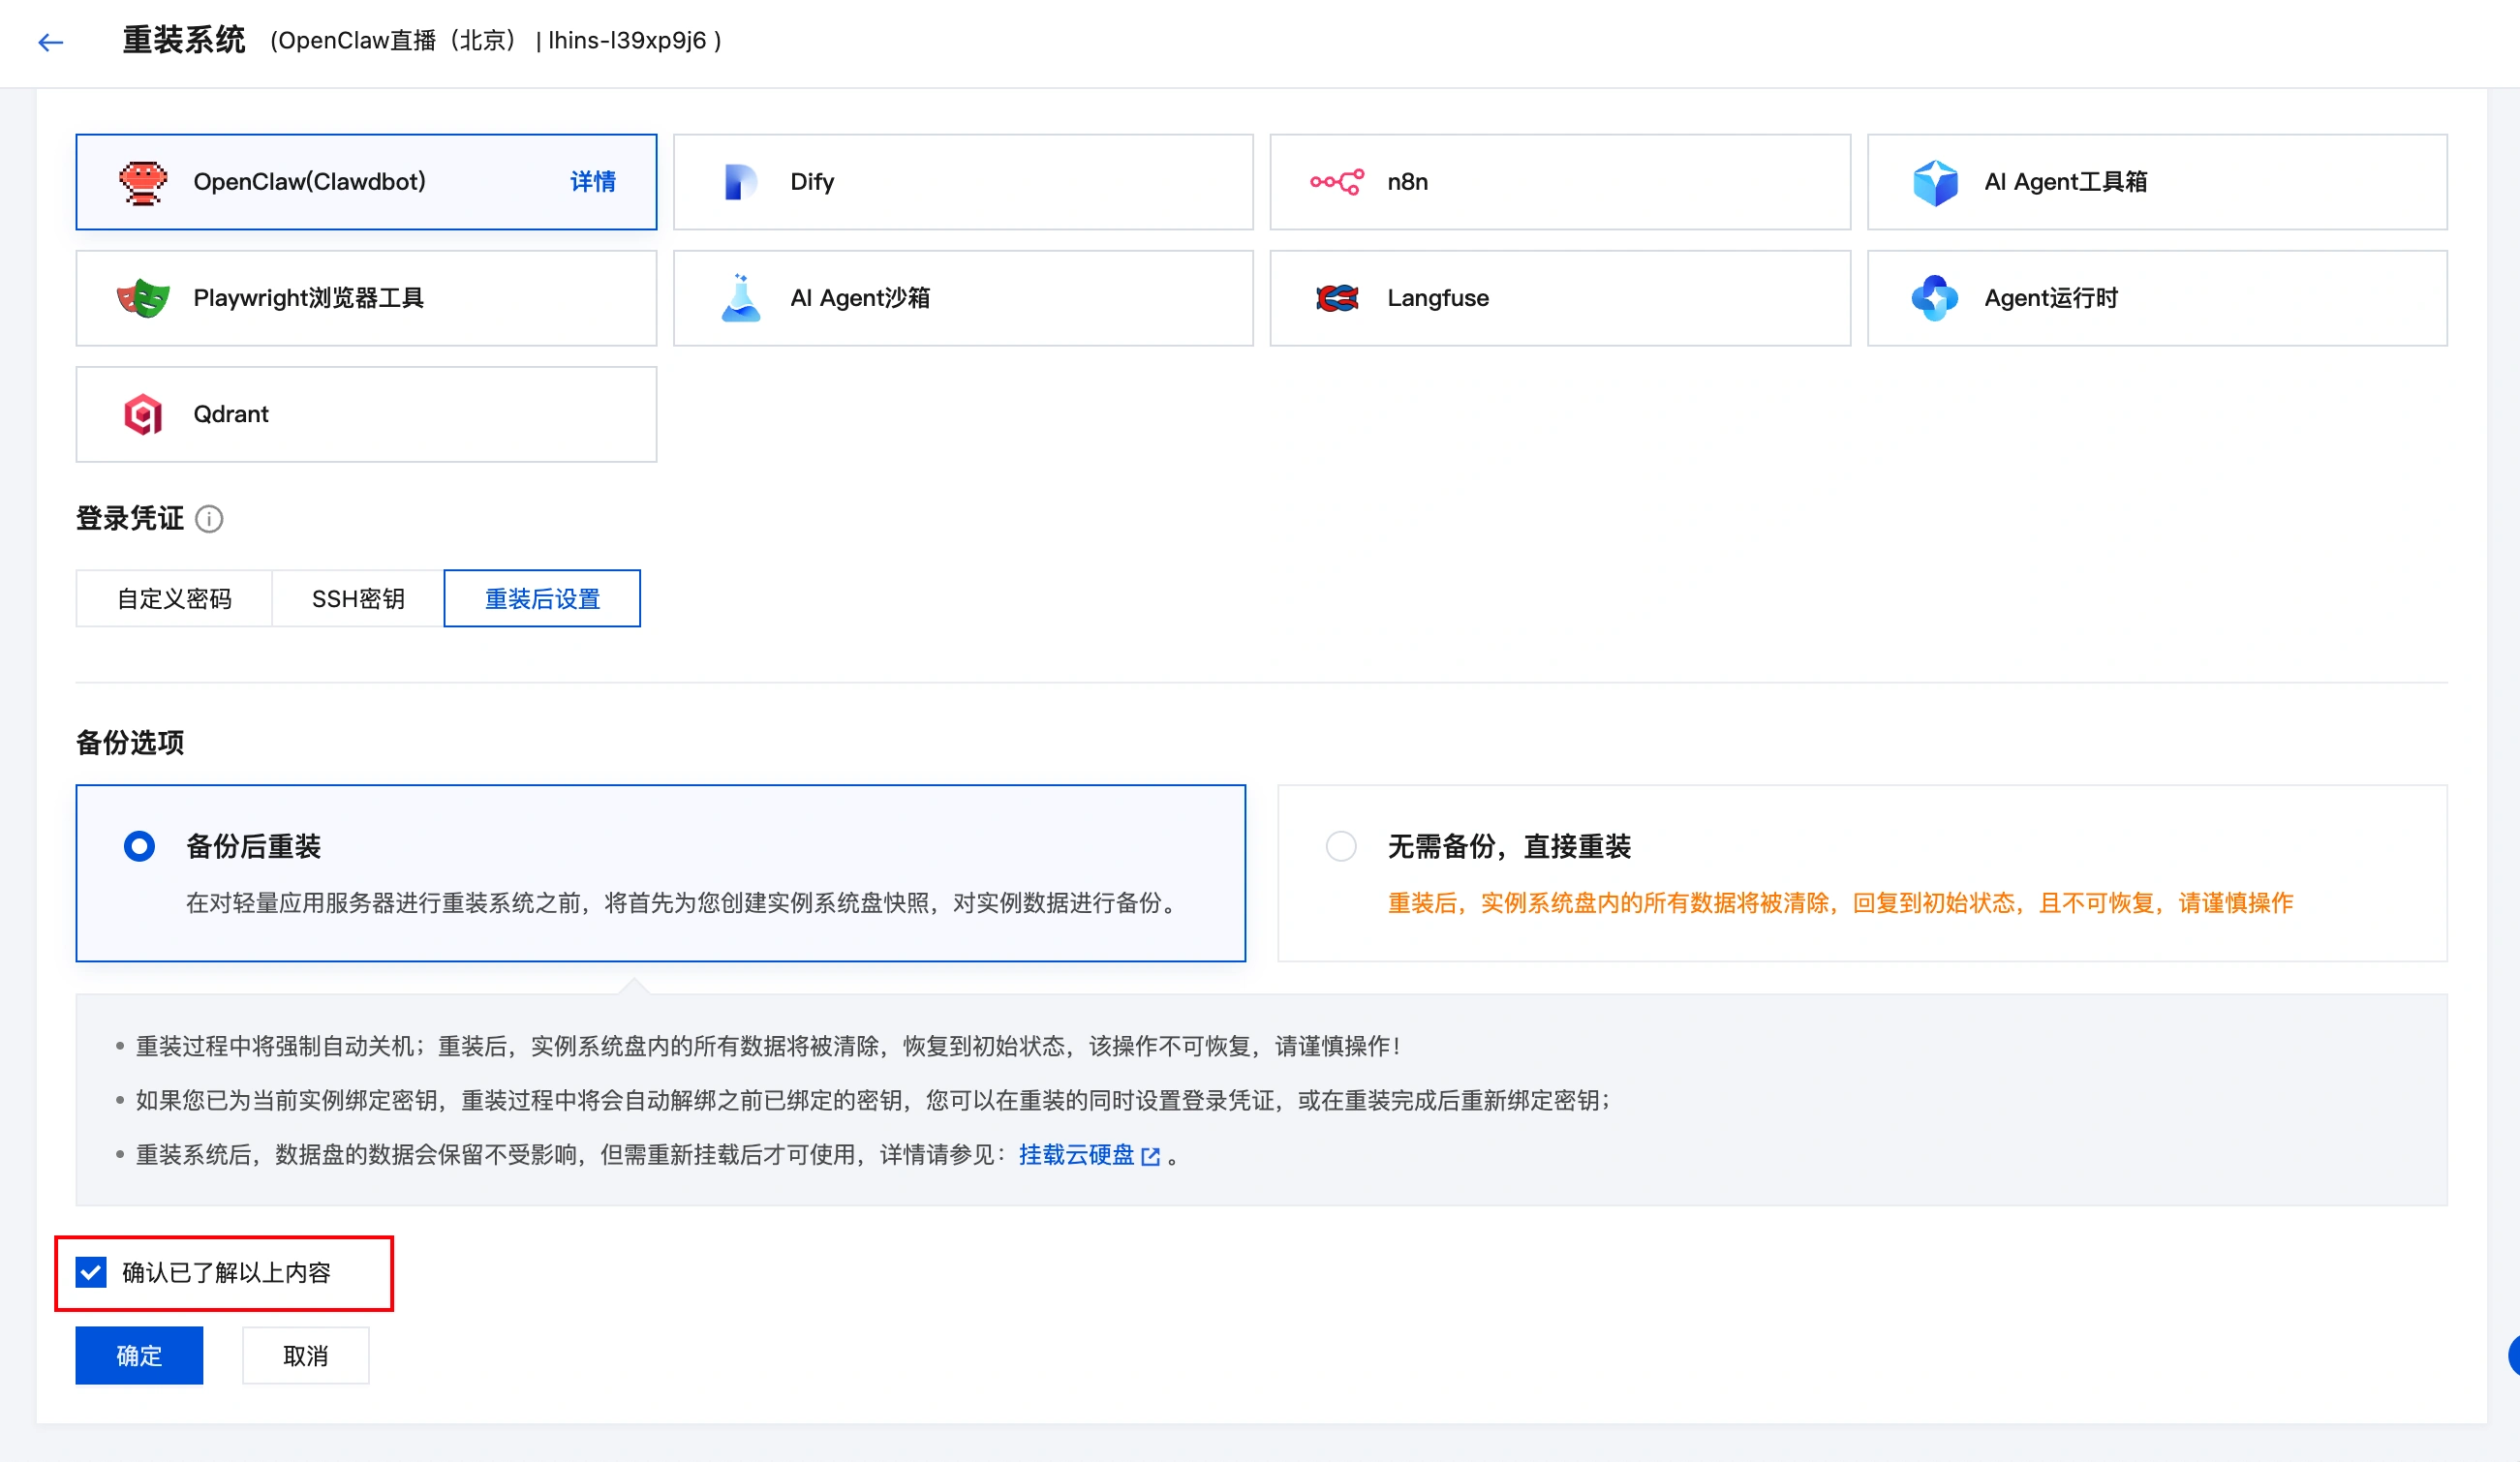
- Scroll down the page and choose backup options based on the actual situation:Here, backup is performed based on the Lighthouse snapshot capability, which completely preserves all data on the instance's system disk at a specific moment. If restoration is needed later, the instance will be reverted to the state it was in when the snapshot was created.It is generally recommended to select Reinstall after backup, ensuring maximum recoverability of data within the current instance. If you have confirmed that the current data can be completely discarded, you may also choose to No backup required, reinstall directly。
- Check “Confirm that you have understood the above content” at the bottom of the page, click OK. Wait a moment, when the instance status changes back to Running When it indicates that the reinstallation is complete.

After the reinstallation is complete, go to the instance's Firewall configuration page to check if port 18789 has been opened.
Step 3: Restore memory for OpenClaw
draw attention to sth.
If your workspace size exceeds 500MB, it is recommended to refer to File Transfer Guide, use a method more suitable for large files for uploading.
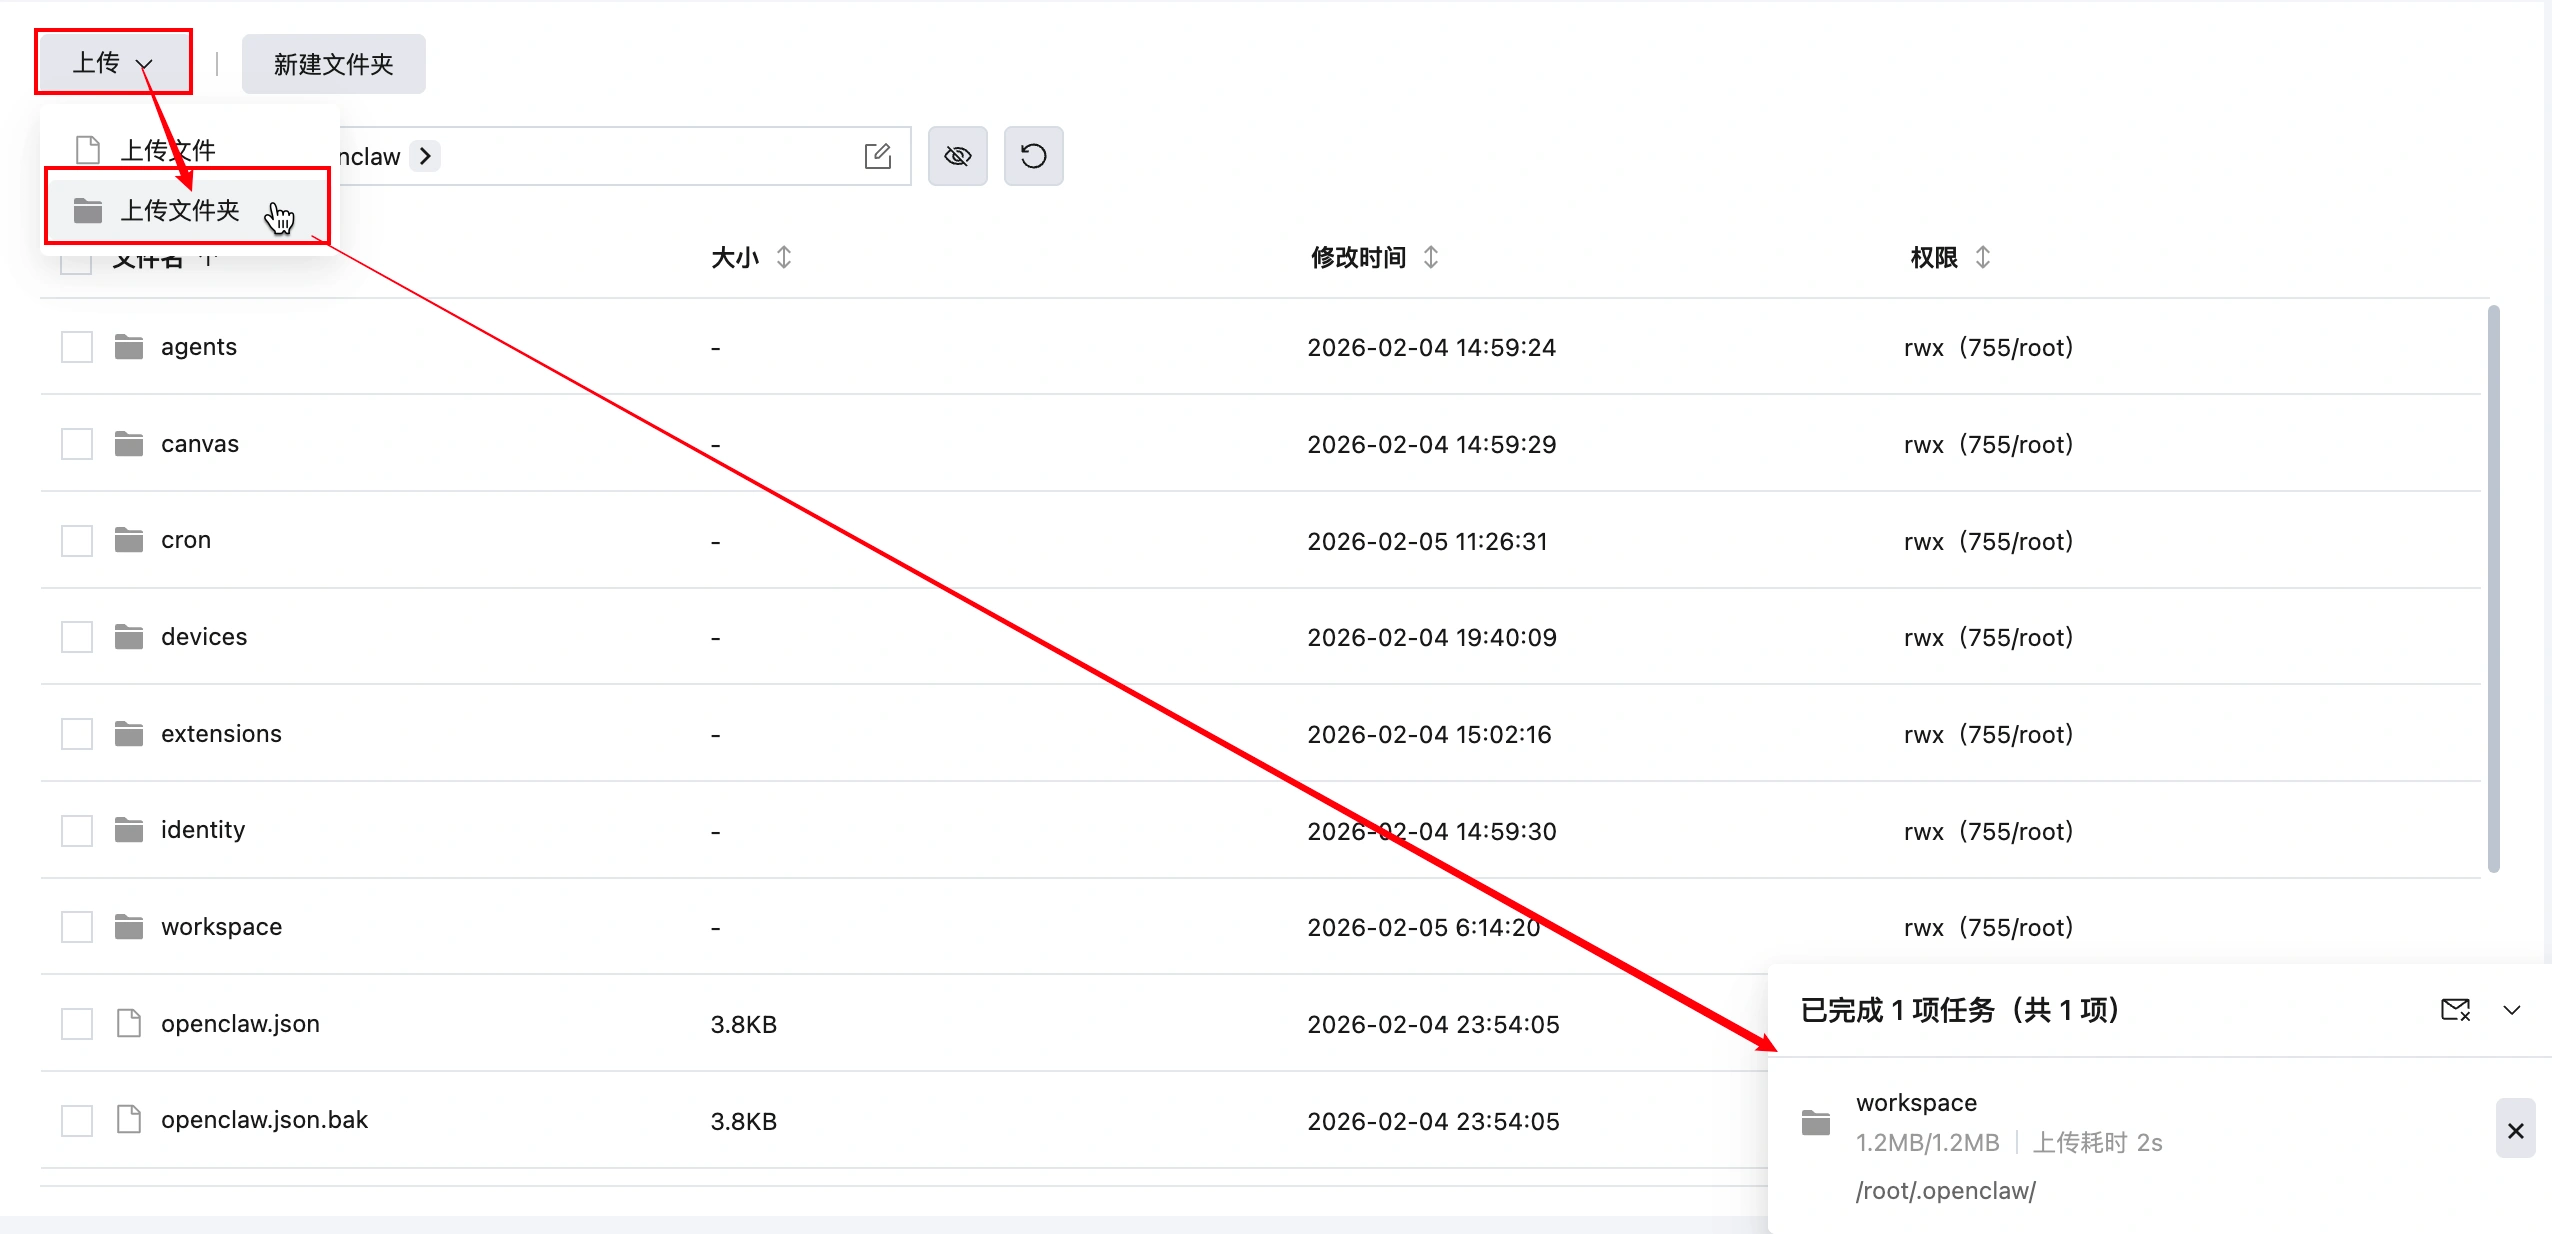
- Log in Lighthouse consoleEnter the server details page, File Management tab, enter in the path input box:
/root/.openclaw/- locate to
workspacefolder, check and click removingto clean up the current blank or default workspace:

- Back on the local computer, first extract the workspace archive saved during the “Download OpenClaw's memory to local” step:
- return to the Lighthouse file management page, select Upload > Upload Folder, after extracting the
workspaceFolder upload to/root/.openclaw/Under the directory:
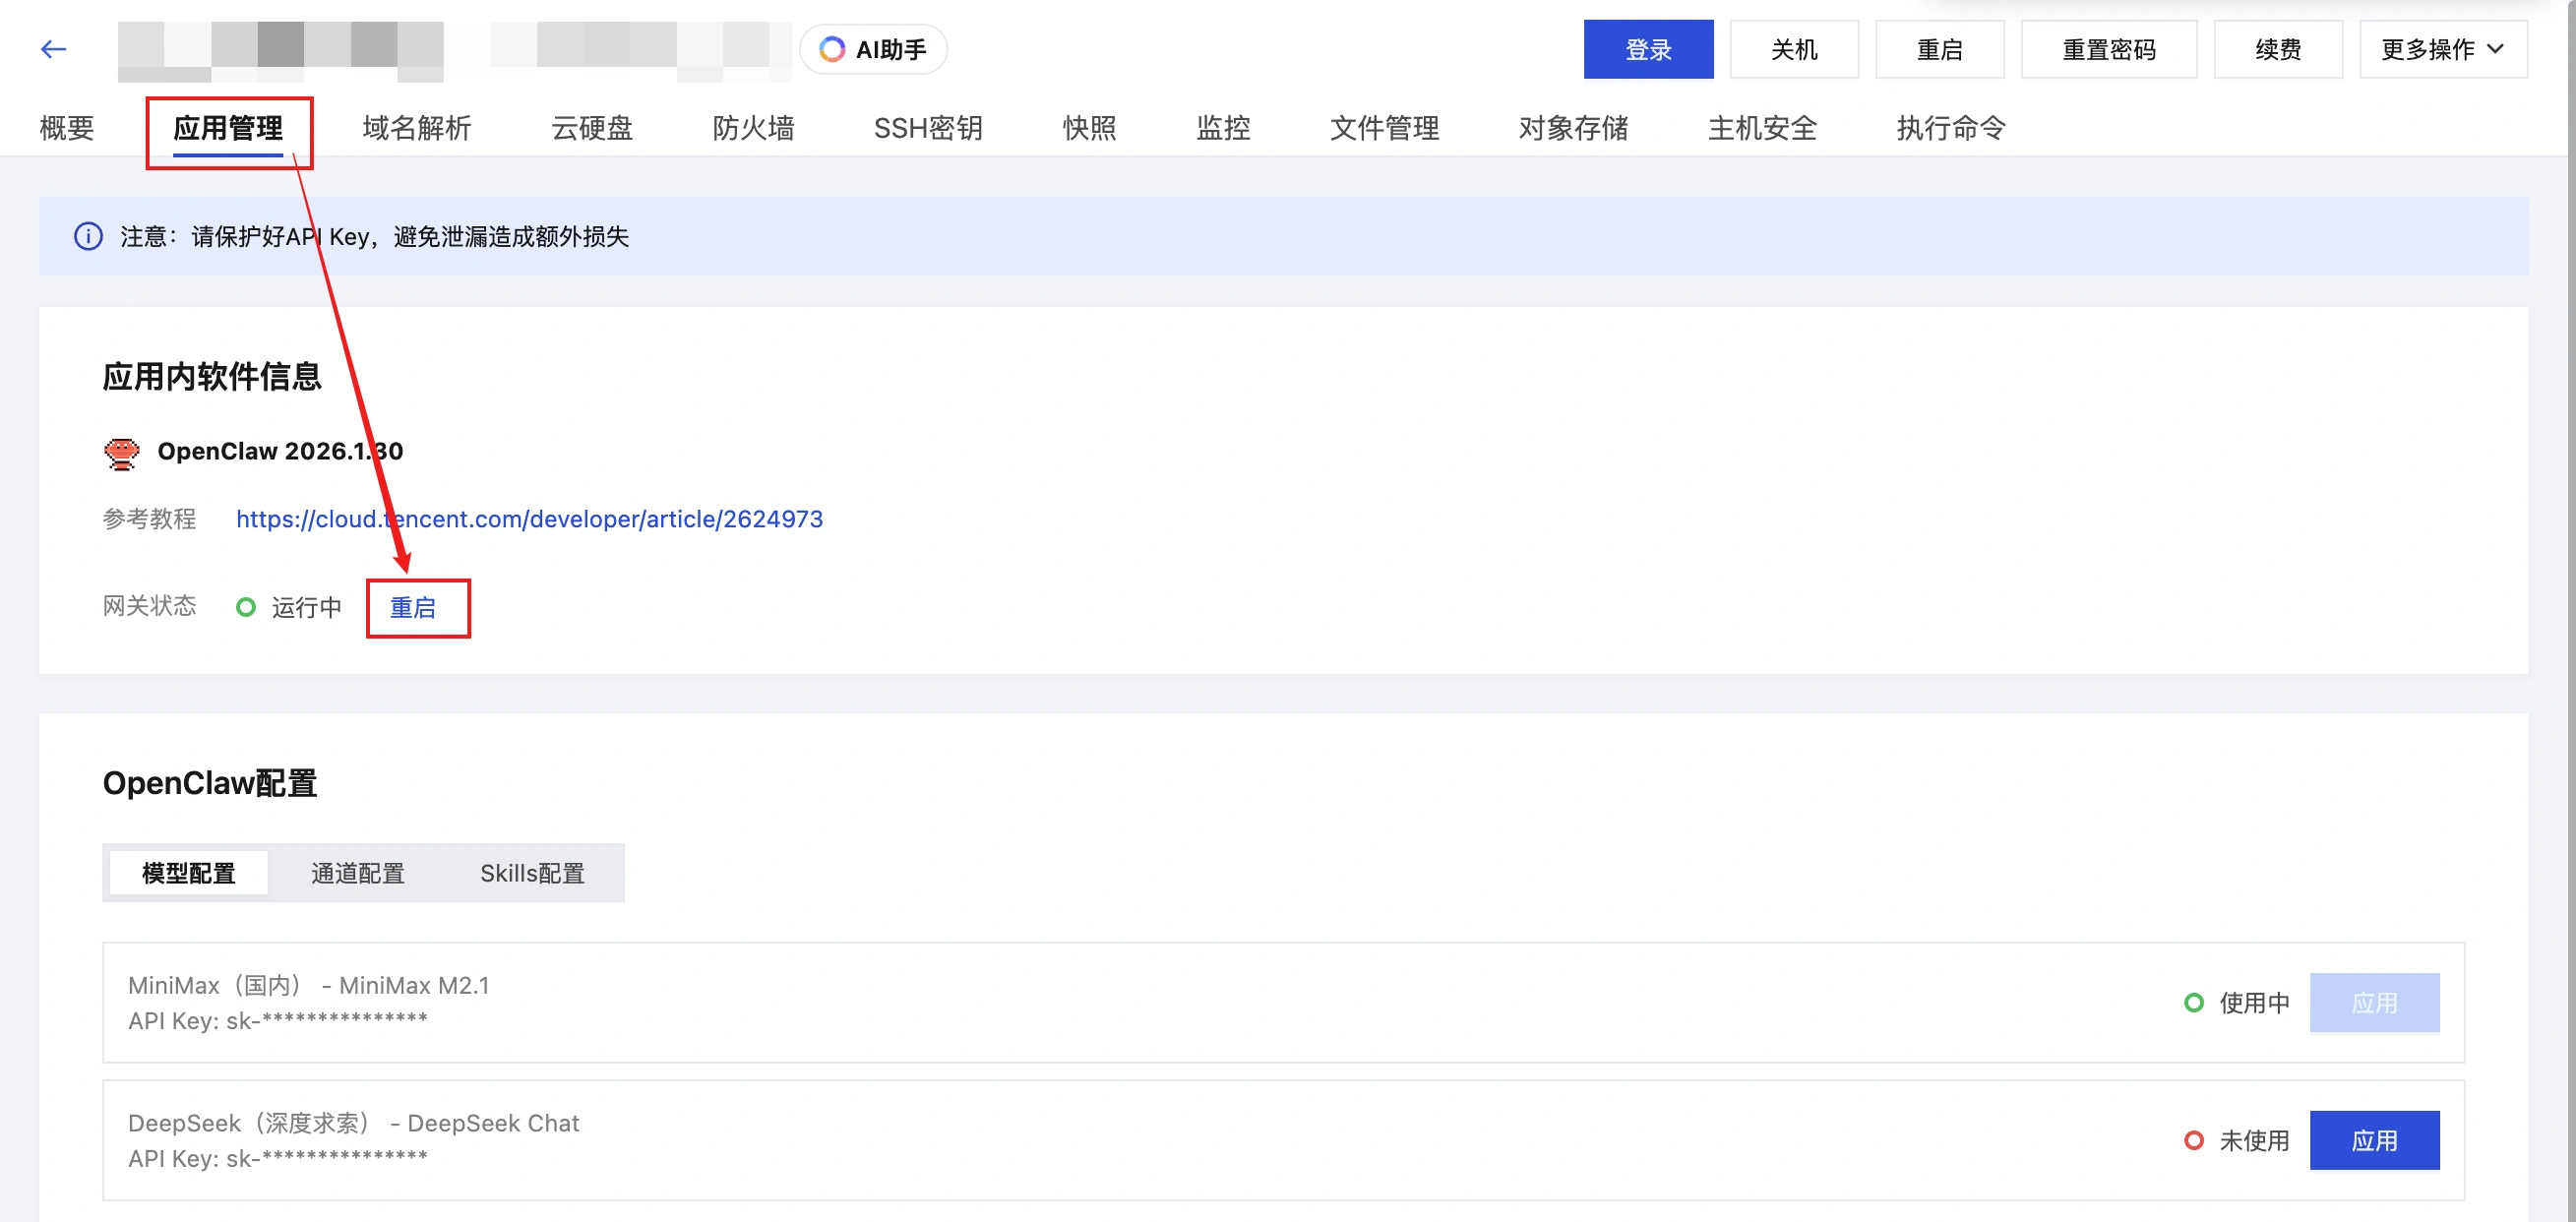
- After uploading, go to the OpenClaw app management page and click Restart Button to reload workspace for gateway:
Step Four: Verify memory recovery effect
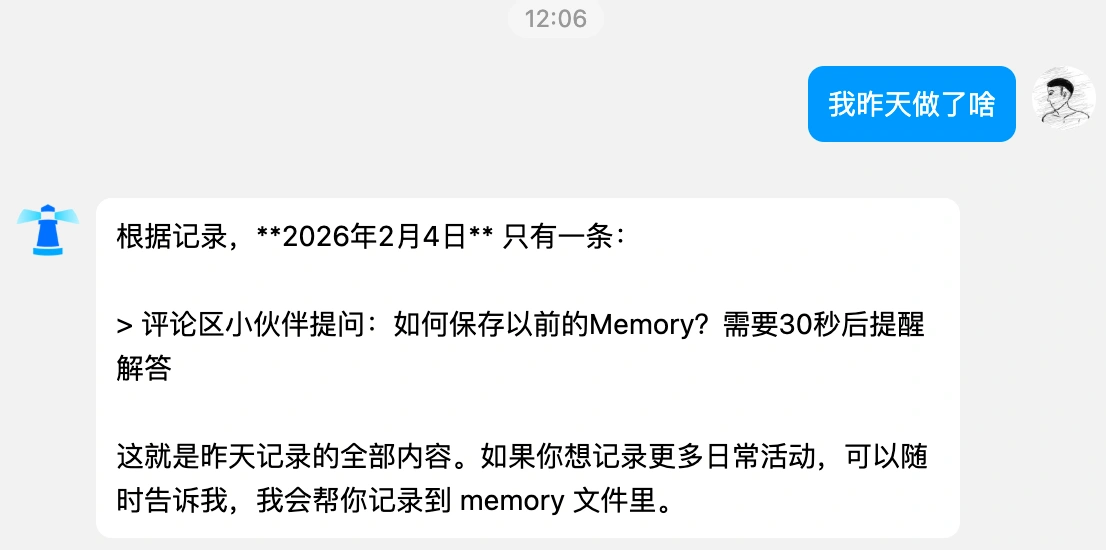
After completing the above steps, you can return to the actual session window (using QQ Bot as an example here) and ask a memory-related question to verify whether the reinstalled OpenClaw has successfully “inherited” the previous memory.
4. What to do next
- Haven't purchased a host yet?View recommended Tencent Cloud China OpenClaw host activities
- Say Goodbye to Cumbersome Configuration: A One-Click Deployment Guide for OpenClaw on Tencent Cloud
- Tencent Cloud OpenClaw Complete Guide to Accessing QQ Bots: From 0 to Chattable
- Tencent Cloud OpenClaw Access WeChat Bot Practical Guide


